


How to Discharge a Capacitor Safely: Step-by-Step Guide
Introduction
Capacitors significantly assume an active role in numerous electronic networks by making use of them to store electrical power to accomplish other goals, including filtration, timing, voltage regulation, or energy delaying. But capacitors may hold a lethal charge long after a device is switched off, minutes or even hours. It is essential to release them accordingly, to avoid electric shock, as well as breakage of equipment or even fires. As an electronics hobbyist, technician, or engineer, learning how to discharge a capacitor safely is a basic fundamental skill in safely repairing or modifying electronic hardware. This guide takes you through the tools, procedural methods, as well as best practices that one needs in order to discharge capacitors safely.
Why You Need to Discharge a Capacitor
When the power supply is switched off, capacitors can retain potentially high voltages, even in the hundreds or thousands of volts. Such accumulated energy can cause an electric shock, burns or severe injury in case of a touch. In circuits powered by high-voltage equipment, such as CRT monitors, microwave ovens, or industrial machinery, the impact may result in death. Capacitors as small as 10 are enough to cause muscle spasms. In addition to personal safety, charged capacitors in a circuit can cause damage to sensitive components either during service or testing. The safest way to rid this stored energy is to discharge a capacitor so that the surroundings are safe around you and your electronic equipment as well.
Tools and Safety Equipment Required
When about to discharge a capacitor, prepare all the tools and safety measures to prevent accidents. The following is what you will require:
- Insulated Screwdriver: The one with a high voltage rated plastic or rubber handle should be used.
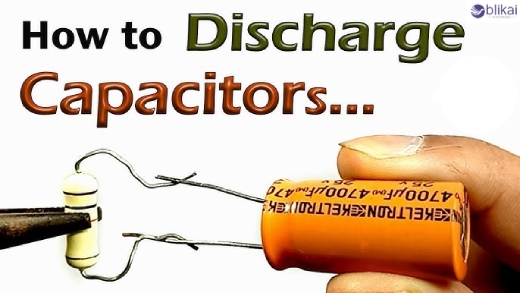
- High-Wattage Resistor: Together between 10k and 100k. Lower resistance will discharge faster, but could cause heating.
- Multimeter: To measure the voltage before and after discharge.
- Alligator Clips: Useful for securely connecting resistors to capacitor terminals.
- Safety Goggles: Protect your eyes from any possible spark or arc.
- Rubber Gloves: Provide insulation against accidental contact.
- Grounding Wire: Ensures charge flows safely to earth potential.
- One-Hand Rule: When handling live circuits, keep one hand in your pocket so that in case of contact, you do not have current running through your chest.
Step-by-Step Guide to Discharging a Capacitor
Turn Off and Unplug the Equipment
Unplug the device from any power source. Make certain the equipment is turned off, and wait a few minutes in order to give any internal bleed resistors an opportunity to bleed off voltage. Nevertheless, do not assume that bleed resistors are always in a useful condition and/ or present at all.
Locate the Capacitor
Find the capacitor in the PCB (printed circuit board). Electrolytic capacitors are typically polarity-marked cylindrical devices, whereas ceramic or film types are non-polarized, in a box or disc shape. Otherwise, consult the help of the service manual or schematics.
Check the Voltage with a Multimeter
Adjust the multimeter with a DC voltage setting. Put the black probe on the negative and the red probe on the positive. The capacitor voltage should be discharged when it shows a value higher than 10V. When dealing with a capacitor that has a rating of above 100V, extreme caution should be exercised.
Discharge Using a Resistor
This is the safest and most controlled method. Connect one lead of the resistor to one terminal of the capacitor using an alligator clip. Then connect the other lead to the opposite terminal. Hold the resistor in place for 20–60 seconds, depending on the capacitance and voltage. Larger capacitors take longer to discharge. Monitor voltage drop using the multimeter throughout the process.
Alternative Method: Insulated Screwdriver (Emergency Use Only)
This method should be applied when you cannot find a resistor. Apply a strong, tight grip on the insulated screwdriver and cross the metal shaft in the capacitor leads. This provides a swift discharge, and it may produce a sharp-cracking sound with an obvious spark. But this method may not be practiced too often due to the capacitors being damaged due to the arcing and PCBs being destroyed as well.
Confirm Discharge with a Multimeter
After you suspect the capacitor cannot hold current anymore, then again, check the voltage with your multimeter. The reading must be about zero volts. In the remaining regardless of where there is a charge proceed with the process of discharging resistor until the voltages have been reduced to a level that is safe.
Safety Tips and Common Mistakes to Avoid
- Do not assume a capacitor is safe after the device is turned off. Always measure with a multimeter.
- Avoid using metallic objects without insulation; they may cause shorts or injuries.
- Never discharge high-voltage capacitors with your bare hands.
- Don’t trust bleed resistors to discharge capacitors fully. Always verify with tools.
- Do not discharge in proximity of inflammable substances, since sparkles can rape these materials.
- In no case should any work ever be done on a conductive surface or on the ground, which causes accidental grounding.
- No safety equipment should be bypassed and no attempting, without the right equipment, to improvise.
How to Discharge Capacitors in Different Devices
- Power Supply Units (PSUs): Use a resistor across the main filter capacitors. These are usually large electrolytic types with voltages from 200–400V in desktop computers or servers.
- Microwave Ovens: Microwaves use high-voltage capacitors connected to the magnetron circuit. Discharge with a 20kΩ resistor using insulated tools. NEVER use a screwdriver due to the risk of arc flash.
- CRT Televisions and Monitors: Discharge the anode of the picture tube using a high-voltage-rated probe and resistor. CRTs store thousands of volts and require special caution.
- HVAC Systems: Before servicing the unit, discharge motor run capacitor and startup capacitors. Never power in at the circuit breaker.
- Audio Amplifiers: Wait a few minutes after turning off. Then use a resistor to discharge large electrolytics in the power supply section.
- Battery-Powered Circuits: Battery powered circuits also must be treated with caution: even low-power battery circuits may hold a charge on capacitors capable of ruining sensitive ICs or other components.
FAQs About Capacitor Discharging
Can you reuse a discharged capacitor?
Yes, provided that it has not been treated badly when it is in use or during discharge. Capacitance and leakage should always be measured before reuse.
Do all capacitors need to be discharged?
Only those that may store harmful energy. Small ceramic capacitors in low-voltage circuits usually don’t require discharge.
Can a capacitor recharge on its own?
In rare cases, yes. Some capacitors can regain a small voltage due to dielectric absorption.
How long does it take to discharge a capacitor with a resistor?
Depends on the RC time constant. Large capacitors or high voltages may take up to a minute.
Is it okay to leave a capacitor charged?
No. It can be a safety hazard even after long periods.
Can I use a light bulb to discharge a capacitor?
Indeed, incandescent bulbs can also be utilised as current-limiting devices, although they are not very accurate compared to the resistors.
Conclusion
It should not be considered as a procedure of discharging a capacitor, but a very essential safety measure. The capacitors would have a strong charge, which could be dangerous to humans and circuitry components. Regardless of whether you are fixing a gadget, altering a circuit or salvaging parts, you must at all times remember that you need to first safely and correctly release any capacitor. Apply as high-wattage resistor as possible to allow controlled discharge, measure capacitor voltage using a multimeter and take any personal safety precautions to prevent eye and hand injury. With some cautious and patient discharge procedures, you could safely handle it to prolong the lifespan of your electronics and yourself.


