


AD797 Op Amp: Ultra Low Noise Precision Amplifier Guide
The AD797 stands as a high-performance operational amplifier that delivers ultra-low noise while serving precision applications demanding superior signal fidelity. The AD797 operates as the top pick for audio and instrumentation systems because it demonstrates market-leading low noise and distortion performance. This guide analyzes the AD797 operational amplifier through its technical characteristics and evaluation versus competing operational amplifiers.
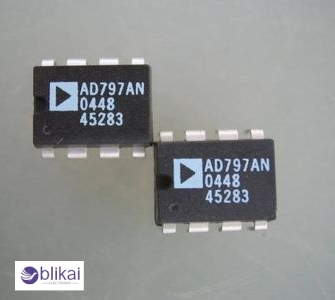
What Is the AD797 Op Amp?
The AD797 from Analog Devices represents an op amp solution designed to deliver high precision through exceptional distortion control combined with minimal noise output. High-end audio applications, alongside data acquisition systems and professional instrumentation, use this component because of its:
- Very low input voltage noise: 0.9 nV/√Hz at 1 kHz
- Ultra-low total harmonic distortion (THD): 0.0001%
- Wide gain bandwidth product: 110 MHz
- Slew rate: 20 V/μs
- Low offset voltage: 50 µV typical
Key Features of AD797
Ultra-Low Noise Performance
The AD797 isn't just quiet - it's whisper quiet on steroids. A 1 kHz noise performance shows 0.9 nV/√Hz performance levels. Today's standards consider this noise performance level extremely minimal, which makes it an excellent choice for audio equipment that requires crystal-clear reception.
Exceptional Distortion Characteristics
Technical specs reveal that the AD797 produces a total harmonic distortion below 0.0001%. Manufacturers building high-end audio products should select this specific component to achieve their best results. Your signals stay clean even when you're pushing the limits.
Precision DC Performance
The offset voltage is tiny - typically just 80μV. What does that mean for your designs? Incredible accuracy without constant trimming or calibration headaches.
Fast Settling Time
Need speed? The AD797 settles to 0.001% in just 2μs. That's lightning fast for precision applications, making it perfect for data acquisition systems where both speed and accuracy matter.
Wide Bandwidth
With a 110MHz gain bandwidth product, the AD797 handles high-frequency signals with ease while maintaining its precision characteristics. This makes it versatile enough for everything from audio to instrumentation to medical equipment designs.
AD797 Specifications
|
Parameter |
Value |
|
Input Voltage Noise |
0.9 nV/√Hz @ 1 kHz |
|
THD + N |
0.0001% typical |
|
Gain Bandwidth Product |
110 MHz |
|
Slew Rate |
20 V/μs |
|
Input Offset Voltage |
50 µV typical |
|
Supply Voltage Range |
±5 V to ±15 V |
|
Input Bias Current |
500 nA max |
|
Output Drive Capability |
±10 mA |
|
Operating Temperature |
–40°C to +85°C |
|
Package Options |
DIP-8, SOIC-8 |
AD797 Typical Applications
High Precision Instrumentation
The AD797 shines in high-precision measurement equipment where noise is the enemy. Think of medical devices that need to detect faint biosignals, or scientific instruments measuring minuscule changes. Audio engineers rely on it for preamps in recording studios where capturing every nuance matters.
Signal Conditioning
When you're working with sensors outputting tiny signals, the AD797 is your best friend. It amplifies these weak signals without drowning them in noise. That's why you'll find it in seismic monitoring equipment, strain gauge amplifiers, and professional audio gear.
Low-Noise Audio Applications
Audio enthusiasts don't just want good sound—they demand exceptional sound. The AD797 delivers ultra-low noise performance in high-end headphone amplifiers and audiophile-grade equipment. The difference is immediately noticeable when you're trying to capture the subtlest details in music reproduction.
Data Acquisition Systems
Data acquisition systems live or die by their signal integrity. The AD797 excels here, especially when you're dealing with low-level signals that need precise amplification before conversion. Its combination of low noise, high speed, and minimal distortion makes it perfect for these applications.
Test and Measurement Equipment
High-performance measurement instruments, including spectrum analyzers and oscilloscopes, depend on the exceptional characteristics of the AD797. The detection thresholds require an amplifier that introduces no noise or distortion to the signal.
AD797 vs Other Precision Op Amps
|
Op Amp |
Noise (nV/√Hz) |
THD (%) |
GBW (MHz) |
Specialty |
|
0.9 |
0.0001 |
110 |
Ultra-low noise/distortion |
|
|
4.5 |
0.002 |
10 |
Audio general-purpose |
|
|
1.1 |
0.000015 |
40 |
Ultra-low THD, audiophile-grade |
|
|
0.9 |
0.0002 |
50 |
Low-noise instrumentation |
Circuit Example: Low-Noise Microphone Preamplifier
A common use for the AD797 is in a microphone preamp circuit. Its ultra-low noise helps maintain the integrity of weak audio signals, often in combination with a high-quality phantom power supply and precision resistor networks.
Designing a Low-Noise Microphone Preamp with the AD797
Want to create a microphone preamp that captures every whisper with crystal clarity? The AD797 is your secret weapon. This circuit example shows how to build a preamp that'll make your recordings shine.
Component Selection
Start with the AD797 as your core. Pair it with metal film resistors (1% tolerance or better) to minimize thermal noise. For capacitors, go with high-quality film types for the signal path and low-ESR electrolytics for power filtering.
Circuit Implementation
The basic topology uses the AD797 in a non-inverting configuration with a gain of about 40 dB. Hook up your mic input through a 10μF film capacitor to block DC, then to the non-inverting input via a 2.2kΩ resistor. Add a 100kΩ feedback resistor and a 2.5kΩ resistor to ground to set your gain.
For phantom power (if needed for condenser mics), incorporate a clean 48V supply through 6.8kΩ resistors.
Power Supply Considerations
The AD797 loves clean power. Use separate ±15V rails with extensive decoupling. Add 10μF tantalum capacitors near the op amp power pins, backed by 0.1μF ceramics for high-frequency noise.
Performance Optimization
To squeeze out maximum performance:
- Keep input traces short and away from digital signals.
- Use a ground plane on your PCB
- Consider a small ferrite bead in series with the input for RFI rejection.
- Shield the entire preamp section if possible.
This circuit delivers less than 1nV/√Hz noise density - perfect for capturing those delicate acoustic performances or critical field recordings.
Design Tips
PCB Layout Considerations
Working with the AD797 isn't just about getting the schematic right—your PCB layout can make or break performance. The ultra-low noise capabilities you're paying for can disappear with sloppy board design.
Keep analog and digital grounds separated, but connect them at one point. Your AD797 needs a clean, quiet environment to perform its magic. Place decoupling capacitors (0.1μF ceramic and 10μF tantalum) as close as possible to the power pins—I'm talking less than 0.2 inches away.
Signal traces should be short and direct. Every millimeter counts when you're dealing with precision signals. And please, route sensitive analog signals away from digital lines and switching power supplies. They're like noisy neighbors who ruin the party.
Gain Optimization
The AD797 really shines at gains below 5, where its noise performance is spectacular. But here's the catch—stability gets trickier at lower gains.
For gains below 10, add a small capacitor (5-20pF) in the feedback loop to prevent oscillation. It's like adding a tiny shock absorber to your circuit.
At unity gain, consider the AD797B variant specifically. It's factory-trimmed for stability in unity gain configurations, saving you headaches and component count.
Power Supply Considerations
The AD797 loves clean power. Use quality linear regulators rather than switching supplies when possible. A simple RC filter in your supply lines works wonders for rejecting power supply noise.
- Power Supply Decoupling: Use 0.1 µF ceramic caps close to the supply pins and bulk capacitors for stability.
- PCB Layout: Keep traces short, especially on the input path, to reduce noise pickup.
- Guard Rings: Use around the input pins to minimize leakage currents in low-current applications.
- Thermal Management: Though low power, keep away from heat sources to maintain offset stability.
Conclusion
Designers who need precision performance with low noise and high fidelity should choose the AD797, which remains a top solution in its category. The AD797 elevates signal clarity and minimizes distortion performance in all types of building projects, including audio devices and scientific instruments, and data acquisition systems.
Related Articles
What is LF353N Op-Amp: Pin Configuration and Applications
TDA2005 Amplifier: Working Principle and Applications
What Do Amplifiers Do? Everything You Need to Know


