


How to Fix an Oil Pressure Sensor?
Is your car's check engine light haunting you with an oil pressure sensor warning?
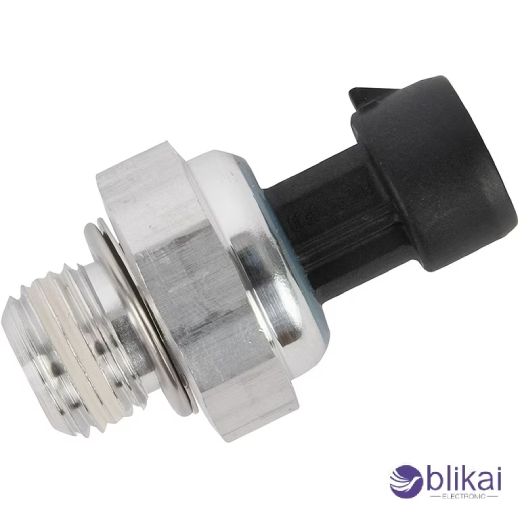
What is an Oil Pressure Sensor?
The oil pressure sensor, also known as an oil pressure transferring unit or oil pressure switch, keeps an eye on the oil pressure in the machine by telling the vehicle's ECU or the hand directly on the dashboard. Its main purpose is to maintain oil pressure in an optimal range, as motor oil is pivotal for the lubricity and protection of machine factors. Low or high oil pressure can indicate implicit problems similar to leaks, oil pump problems, or wear within the machine; therefore, an oil pressure sensor will prove to be a critical tool for opinion.
How It Works
1. Sensing Mechanism: The sensor uses a diaphragm or strain hand that responds to changes in pressure.
2. Signal Output: The type of output generated by the sensor can be analog(similar as voltage or resistance change) or digital, depending on the type of sensor and machine control system. This varies with the pressure situations.
3. Alert or Indicator: High/Low Oil Pressure Warning Light to alert the driver to check the oil level or engine health, when oil pressure falls out of normal.
Applications of Oil Pressure Sensors
Oil pressure sensors are primarily used in:
- Automobiles: For monitoring engine health and warning of potential engine problems.
- Heavy Machinery: To ensure that oil pressure remains sufficient to prevent mechanical failures.
- Aerospace and Marine Engines: Where continuous and accurate oil pressure monitoring is critical for operational safety.
Causes of Oil Pressure Sensor Failure
An oil pressure sensor can fail for various reasons, leading to malfunctions in its ability to read/hear an engine's oil pressure level. Some of the common causes of failure of oil pressure sensors are:
1. Wear and Tear: Over time, the sensor’s internal components, like the diaphragm and electronic circuitry, can wear out, especially in high-mileage or older vehicles. Regular exposure to high temperatures, vibration, and oil flow adds to this wear.
2. Oil Contamination: If oil has dirt, debris, or sludge in it, it can cause the sensor to corrode or clog. This contamination could block the sensor's openings, yielding an inaccurate reading or immediate sensor failure.
3. Electrical Issues: Wires problem such as stick, causing an inability of the sensor to communicate with the engine control module. Because of faulty wiring, intermittent or total failure of signal from the sensor may occur.
4. Excessive Heat: The sensor is often put right next to the engine, where it endures hot temperatures. Exposure to greater heat levels can consequently damage its electronic seals and components in time.
5. Mechanical Damage: Physical impact on the sensor's housing or connectors due to improper installation, engine repair, or some type of road debris can cause issues, failing the sensor or creating an oil leak.
6. Over-pressurization: The oil pump or the arrangement of the oil inside the engine can cause an over-pressurization of the oil in the engine, thereby exceeding the rated pressure on the sensor.
7. Poor Quality or Defective Parts: A low grade or damaged oil pressure sensor may fail quickly. This is especially true if proper protection against oil contamination is lacking. temperature fluctuations or electrical noise.

Step-by-Step Guide to Fixing an Oil Pressure Sensor
Step 1: Locate the Oil Pressure Sensor in Your Vehicle
First, you will need to locate the oil pressure sensor in your vehicle. It is generally located near the oil filter or oil pan. Depends on brand and model If you are unsure of the exact location Check your car's manual or a reliable online resource. This is because it will help you avoid unnecessary disconnects. When located, always make sure that you have enough room to access it dangled free; this makes everything less complicated. A flashlight or work light is also good to have since the sensor's tilting position is often quite restricted or tucked away in the dark recesses of the engine bay.
Step 2: Disconnect the Battery for Safety
For safety reasons The battery must be removed before operating any electrical equipment in your vehicle. Find your battery. It's probably under the hood. Remove the negative terminal first. Using a key or socket to loosen and remove it. You may have to do the same to get a positive ending. You release the power source, which reduces the risk of electric shock and the chance of the sensor short-circuiting while working. It also protects you from potential losses and helps prevent damage to your vehicle's electrical system.
Step 3: Remove the Electrical Connector from the Sensor
Next, you will want to undo the electrical connector from the oil pressure sensor. This connector is going to be what powers the sensor and what sends and receives messages from the sensor, so be careful when disconnecting it. Look over the connector to see if there are any clips or tabs to remove it from the sensor. Lightly press down on whatever is holding it in place, and then pull the connector straight off. Do not pull on the wires themselves, as you may damage the wiring. If the connector seems to be stuck, try wiggling it very gently instead of forcing it, which will break it.
Step 4: Remove the Faulty Sensor Using the Socket Wrench
Once you have taken off the electrical connector, go ahead and take out the failed oil pressure sensor. Use a socket wrench with a tight fit over the sensor so as not to strip or damage it. Turn the wrench counterclockwise to loosen and take out the oil pressure sensor. Sassoses! You have to be prepared to get a little oil leak from there while you remove it, so keep a rag or cloth handy. This one can be easy or tricky, depending on whether the sensor is stuck or over-tightened, and you must be patient with a steady hand to prevent any damage to the surrounding components.
Step 5: Clean the Area and Install the New Sensor
It is best to clear the area of the old one before installing the new sensor. A clean rag should remove all oil, dirt, and grime from the sensor holder to guarantee a good seal. Now replace the oil pressure sensor with a new one and, if necessary, apply a small amount of thread sealant to prevent oil leaks. Carefully screw the new sensor into place by hand. Avoid cross threading. And when finished Tighten it with a socket wrench. Note that you must take care not to overtighten, either, as this could damage the sensor or surrounding threads.
Step 6: Reconnect the Electrical Connector and Test
Once the new sensor is in place Reconnect the electrical connector by pressing firmly against the sensor until you feel and hear a click. Then reconnect the battery after locking it in place first, positive terminal, then negative terminal. Start the vehicle and check the oil pressure light on the dash. Additionally, look under the hood for leaks from the newly installed sensor. If the instrument panel light remains off and the sensor area is dry. This indicates that you have successfully replaced the oil pressure sensor.
Conclusion
A properly functioning oil pressure sensor is important to the health and longevity of your engine. Following this step-by-step guide You will successfully replace the broken sensor and be able to accurately check the oil pressure in your car again. However, always check your manual for specific installation instructions and torque specifications.
Frequent maintenance and alertness to warning signs will allow one to continue averting sensor failures and costly engine repairs. A DIY mind-set or general conscious awareness on how it all goes down will enable one to maintain and preserve the oil sensor's efficiency. In case of any doubts, I recommend seeking the counsel of a professional to ensure a good job is done.
Related Articles
Differential Pressure Sensor: Working, Applications and Types
Smart Sensors: Introduction, Features and and Applications
What is a Capacitive Sensor: Types and Applications (2024)


