


How to Test a LED Driver: Step-by-Step Guide
What Is an LED Driver?
An LED driver is an electronic device that controls the voltage or current to LEDs, guaranteeing steady operation and avoiding breakdown. Depending on the kind of LED load, LED drivers may be constant current (CC) or constant voltage (CV). Effective testing helps to make the LEDs run efficiently, ensure they run longer and do not have flickering or dimming problems or burnouts.
Common Symptoms of a Faulty LED Driver
Malfunctioning LED drivers may exhibit various indicators of poor functioning, and they may include flickering lights, intermittent operation, weak or no output, overheat or strange noise. The early detection of these will avoid the destruction of LEDs and other parts of the lighting system. Ordinary symptoms are used to determine whether it is the driver or the LED.
Flickering or Intermittent Output
Flickering or changing lights often show that there is no consistency in the delivery of voltage or current. This may be due to damaged parts within the driver, faulty connections or heating problems.
Dim or No Light Output
The LEDs that do not illuminate to full intensity or do not turn off can indicate a malfunction of the driver output, or an internal short or overload.
Overheating or Burn Marks
Excessive heat, swelling, or burn marks on the PCB suggest internal faults. Overheating can lead to permanent driver failure if not addressed.
Unstable Voltage or Current Levels
Unstable values of a multimeter usually mean that a driver cannot sustain a given output, and this affects the performance of the LEDs.
Audible Noise or Buzzing
Buzzing or humming can point to failing capacitors, inductors, or poor filtering, which can also affect LED stability.
Safety Precautions Before Testing
Testing an LED driver involves working with live electrical circuits, so safety is crucial. Always disconnect power before opening the driver, use insulated tools, and ensure the workspace is dry. Understand the driver’s rated input and output specifications to avoid shocks or short circuits. Avoid touching AC mains components directly.
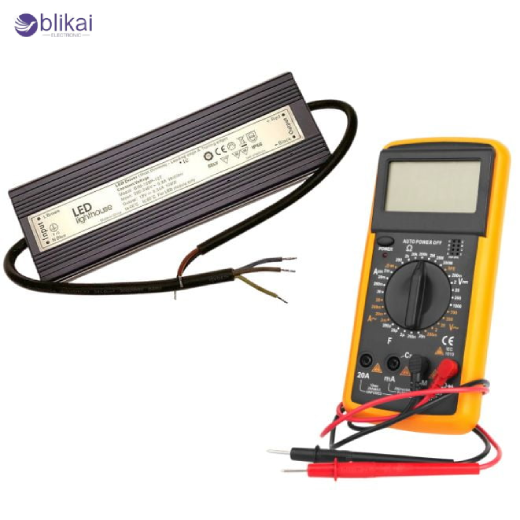
Tools You Need to Test an LED Driver
A voltage/current meter/ digital multimeter, test LEDs or an appropriate LED load, insulated screwdrivers, and other optional tools, such as a variable AC/DC power source, will be needed to safely, effectively test an LED driver. The availability of proper tools makes the testing accurate and prevents the destruction of the driver or LEDs.
How to Test an LED Driver (Step-by-Step)
Step 1 – Identify Driver Type (CC or CV)
Check the driver label or datasheet to determine whether it is a constant current (CC) or constant voltage (CV) type. Knowing this helps you measure the correct parameter — current for CC drivers or voltage for CV drivers — to avoid incorrect testing.
Step 2 – Check Input Voltage
Use a multimeter to confirm the input voltage matches the driver’s rated AC or DC input. Incorrect input voltage can lead to immediate driver failure or inaccurate output measurements.
Step 3 – Measure Output Voltage and Current
For CV drivers, measure the output voltage across the terminals. For CC drivers, measure current through the LED load. Compare the readings to the rated values to identify whether the driver is working properly or not.
Step 4 – Test the Driver Under Load
Install the driver and connect it to an LED load of choice and monitor performance. Look for flickering, sudden drops in output, or overheating. This step validates real-world operation beyond simple no-load voltage checks.
Step 5 – Inspect for Physical Damage
Check the PCB for swollen capacitors, burn marks, loose connectors, or corrosion. Electrical faults are usually associated with physical damage, and they may need the replacement of the driver.
Step 6 – Test with a Known-Good LED
By connecting the driver to an approved working LED, one can be able to confirm whether the driver or the original LED was the problem. This action will eradicate the uncertainty in the troubleshooting.
Understanding LED Driver Output Readings
Normal Output Ranges
Constant current drivers normally have 300mA, 500mA, 700mA or 1A current, where constant voltage drivers have typical voltages such as 12 V, 24 V, or 36 V. Correct readings indicate a healthy driver.
Abnormal Readings and What They Mean
Zero output, overvoltage, or fluctuating values suggest faults like open circuits, shorted components, or unstable regulation. The identification of these assists in identifying repair or replacement requirements.
How to Test Dimmable LED Drivers
Triac (Leading-Edge) Dimmable Drivers
Test using a compatible leading-edge dimmer. Monitor changes in brightness and see that there is minimal flicker at the various lower levels of brightness.
0–10V Dimmable Drivers
Apply a 0–10V control signal and measure the LED output. The control voltage should have a linear relationship with the output.
PWM Dimmable Drivers
Feed a PWM signal and verify the driver adjusts LED brightness proportionally. Use an oscilloscope if necessary to confirm the PWM waveform.
DALI or Smart-Control Drivers
Test using a DALI controller or smart interface. Ensure that the brightness adjustment is smooth, and the driver is sensitive to all the control signals that it supports.
LED Driver Troubleshooting Tips
If testing reveals issues, first verify LED compatibility, wiring polarity, and upstream switches or transformers. Thermal shutdown may be triggered by inadequate ventilation. There are situations where a driver might seem defective, yet they just require either a load reconnection or adjustment.
When to Replace a LED Driver
Replace a driver if output readings remain out of specification, there is visible damage, or performance is inconsistent under proper load. Sometimes replacement is more cost-effective than repair, especially for integrated or sealed drivers.
FAQ
Can I test an LED driver without LEDs?
Some tests (like measuring no-load voltage) are possible, but testing under a proper LED load ensures accurate results.
What multimeter setting should I use?
Use voltage mode for CV drivers and current mode for CC drivers. Ensure the meter’s range covers the expected output.
Why does my LED driver show voltage but no light?
The LED load may be faulty, connections reversed, or the driver may not handle the load properly.
Is it safe to repair LED drivers?
Repairing drivers involves high voltages and can be dangerous. Replacement is generally safer and more reliable.
How long do LED drivers typically last?
Good quality drivers are 30,000-50,000 hours; however, heat, overloaded, and voltage bursts may reduce the life.
Should you test for output ripple and noise?
Yes. Stable DC output is essential for flicker-free LEDs. Output ripple or AC noise can damage LEDs or reduce lifespan. Use a scope to observe the waveform, or measure the AC voltage on the DC output with a multimeter. A significant ripple indicates aging capacitors or poor regulation.
Should you perform thermal tests under load?
Absolutely. Short-term tests don’t reveal overheating issues. Monitor the driver with a thermal camera or IR thermometer during extended load operation. Temperatures above the recommended range indicate component stress or insufficient cooling.
Should I test the driver’s protection mechanisms?
Yes. Test features like short-circuit protection (SCP), over-current (OCP), over-voltage (OVP), and over-temperature (OTP) in a controlled, safe manner. A reliable driver should limit output or enter hiccup mode without damage.
Why is using a proper LED load or electronic load important?
Using a single LED or resistor is insufficient. The electronic load is an LED load simulator that is used to test the stability of the output, the startup behavior and the compatibility with dimming. This makes sure that it is assessed correctly in the actual operating conditions.
Conclusion
The process of testing an LED driver includes the knowledge of the type of the driver, measurement of the correct input/output, and examination of damages, as well as validation of the performance under the load. Correct testing will eliminate failure of LEDs, provide uniform lighting and prolong component life. These measures will help amateur users and professional electricians to have safe and reliable lighting systems using LED.
Some images are sourced online. Please contact us for removal if any copyright concerns arise.


