


How to Test a Circuit Breaker with a Multimeter[DIY Guide]
With fuses, your electrical system is protected from dangerous surges and short circuits. Suspecting a circuit breaker has failed? A multimeter gives a simple way to test it. Learn from this guide how to check your circuit breaker properly and safely.
What Is a Circuit Breaker?
A circuit breaker is a switch that automatically operates to prevent damage to an electrical circuit when there is an overload or short circuit. Its basic task is to stop the current when a problem is identified. In contrast to a fuse, which works only once and should be changed, a circuit breaker can be restarted to return to its original function.
How a Circuit Breaker Works
A circuit breaker works automatically to shield electrical circuits from receiving too much current. Should the electricity current in the circuit exceed a specific limit, the breaker will trip, cut off electricity and open the circuit. This helps to stop wires and devices from becoming too hot and being damaged. After clearing the fault, the breaker can be reset using either its circuit or a manual button.
Why Test a Circuit Breaker?
A circuit breaker should be checked regularly for both safety and the reliability of your electric system. A circuit breaker exists to stop power from getting overloaded or shorted which could harm the electrical system. Should a breaker have a problem or not operate correctly, it may not turn off automatically when something bad happens, making fires, appliance damage and injuries possible. Training all along finds any issues early and the breaker kicks in whenever needed.
Common Reasons Breakers Trip:
- Overloaded circuits (too many devices plugged in)
- Short circuits
- Ground faults
- Faulty appliances or wiring
Tools and Safety Equipment Needed
Before testing, gather these essential tools:
- Digital multimeter(with voltage and continuity settings)
- Insulated screwdriver
- Safety gloves and goggles
- Voltage tester(optional)
- Flashlight(if your panel is in a dark area)
Safety Precautions Before You Start
Working with electricity can be dangerous. Always take proper safety measures:
- Turn off all connected devices on the suspect circuit.
- Before starting any tests at the breaker panel, turn off the main breaker, except when doing voltage testing.
- Slip on gloves and shoes that have rubber soles.
- Living wires should never be touched with unworn hands.
- If you’re not sure about a repair, call a professional electrician.
Step-by-Step Guide to Test a Circuit Breaker
Step 1: Turn Off the Main Power
Be sure to turn the main power supply at your electrical panel off before starting any tests. The need to avoid electric shock means that this step is very important when you’re working in the breaker panel.
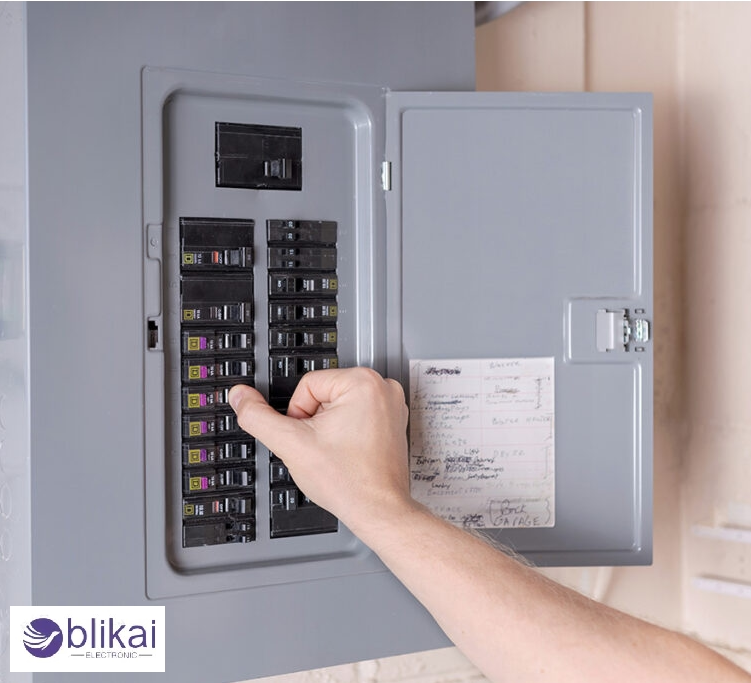
Step 2: Remove the Panel Cover
Softly remove the panel cover from your hands using a screwdriver. Be careful not to come in contact with any of the exposed wires or terminals inside the panel.
Step 3: Perform a Visual Inspection
Check if you see any burns, corrosion, cracks or loose connections on the circuit breakers. Any noticeable damage means the breaker could require a replacement.
Step 4: Set Up Your Multimeter
For a voltage test, select AC volts, and for continuity, go for the continuity measure. When checking for voltage, use a range higher than your system. For usual cases with AC, this is either 200V or 600V.
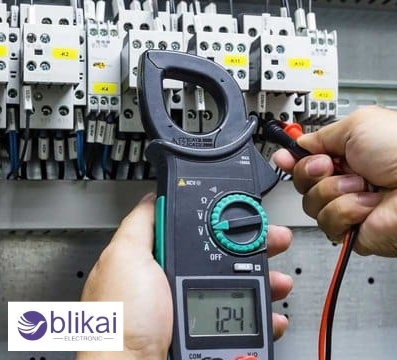
Step 5: Test for Voltage at the Breaker
- With the breaker activated, use one multimeter probe on its terminal (load side) and the other one on the ground or neutral connection you know.
- The voltage displayed by the multimeter should equal your system voltage which will either be 120V or 240V depending on what type your breakers are.
- Sometimes, if there is no current, the breaker can become damaged and may have to be reset.
Step 6: Test for Continuity
- Make sure to turn it off at the breaker first.
- Adjust the multimeter to operate either in continuity or resistance mode.
- Open the breaker to cut the electricity flow to the wire.
- Put a probe on the breaker’s line terminal and the other on the load terminal.
- If the breaker is in the ON position, the multimeter should respond with a sound (continuity) or display a very small number, meaning the circuit is complete. When it is not engaged, the switch must show both open circuits and infinite resistance.
Step 7: Test the Trip Mechanism
- Test buttons can be found on some breakers; press the button to see if the breaker trips in response.
- If the breaker doesn’t have a test button, you can use a dedicated tool to press the breaker through an overload to test it.
- Should the breaker survive this test without tripping, it is most likely broken and should not be trusted.
Step 8: Reset the Breaker
- After testing, switch the breaker fully OFF and then back ON to reset it.
- Verify if the power is restored to the connected circuit.
Step 9: Replace the Panel Cover and Restore Power
- Operation Air Conditioner
- Switch on the main power supply after you’ve checked everything.
- Look at each electronic device attached to that breaker to make sure it is working correctly.
Safety Tips:
- Be sure to use gloves and rubber boots to protect your skin from the current.
- Only work with bare wires or terminals when the power is turned off.
- If you feel unsure or unsure inside the electrical panel, it’s best to have a licensed electrician take care of it.
How to Tell If a Circuit Breaker Is Bad
Sometimes a faulty circuit breaker will not cut off current when something is wrong, and at other times it will trip unnecessarily. Additional warning signs are a hot breaker, damage to the device and difficulties resetting it. If using a multimeter, a lack of continuity when the breaker is on can show that the switch may be defective.
Common Signs of a Faulty Breaker
- Frequent tripping without an apparent cause
- Burning smell or visible scorch marks near the breaker
- The breaker won’t reset or stay in the OFF position
- Flickering or dimming lights when the breaker is on
- Warm or hot breaker panel during or after operation
When to Replace a Circuit Breaker
Should a breaker keep tripping, become damaged or not reset at all, it should be changed as soon as possible. Breakers can lose their dependability with time because of wear and tear. Switching out a bad breaker helps keep your electrical system in good working order and protection.
FAQs About Circuit Breaker Testing
Can I test a breaker without a multimeter?
Yes, with a voltage tester, but it won’t give precise voltage or continuity results.
How often should I test my breakers?
There’s no strict schedule, but test them if:
- Power fails unexpectedly.
- You notice burning smells or heat.
- A breaker frequently trips.
Can breakers go bad over time?
Yes. Age, corrosion, heat cycles, and overuse can wear them down. Most last 15–30 years.
Is it dangerous to test a live breaker?
That’s right—if you do it incorrectly. Safety gear and instructions should always be used. If you aren’t sure what to do, shut off the main power as an initial precaution.
Can a circuit breaker fail without tripping?
Yes. A breaker may fail inside and no longer conduct electricity, seeming perfectly normal from the outside.
Is it safe to test a breaker while the panel is live?
Only if you are careful and know the risks. Always put on safety clothing and grab handle insulated tools.
Can I reset a breaker without testing it?
Yes, but if it trips again or doesn’t hold, testing is strongly recommended.
Conclusion
Making use of a multimeter to look at a circuit breaker is a practical thing for anyone handling electrical issues. Safety steps and proper tools will guide you in determining if your breaker is healthy, needs fixing or should be replaced.


