


How to Replace a Circuit Breaker: Step-by-Step Guide for Safety
Learning to replace a circuit breaker is necessary for your electrical system’s proper and safe functioning. Indeed, though it sounds complex, you can perform repairs with the right tools and information, conceivably saving the cost of an electrician and precluding time without power.
In this fresh companion, you’ll get detailed instructions, deep specialized explanations and important troubleshooting information for replacing a circuit breaker in your home.
What Is a Circuit Breaker
If more current than allowed enters a circuit, if it shorts or if there is an electric ground fault, a circuit breaker will suspend the electricity. Whereas after a fuse trips, it has to be replaced, a circuit breaker can be simply reset. They serve to keep your devices and wiring from getting fried.
How Circuit Breaker Works
Positioned inside the breaker is a strip made of two different substances or a coil that detects further current than usual. When it's touched off, the switch outside is made to open and stop the inflow of electricity.
Comparison: Common Types of Breakers
|
Type |
Current Rating |
Voltage |
Application Area |
Interrupting Medium |
|
MCB |
Up to 125A |
Up to 415V |
Residential |
Air |
|
MCCB |
Up to 2,500A |
Up to 1,000V |
Industrial |
Air |
|
ACB |
800–10,000A |
Up to 690V |
Heavy-duty industrial |
Air |
|
VCB |
Up to 66kV |
Medium voltage |
Utility/Industrial |
Vacuum |
|
SF₆ Breaker |
Up to 800kV |
High voltage |
Transmission networks |
SF₆ gas |
|
GFCI |
Low current |
Up to 240V |
Wet areas |
Electronic detection |
|
AFCI |
Standard load |
Up to 240V |
Residential |
Arc detection |
|
RCCB |
Low current |
Up to 240V |
Human protection |
Electronic |
Why Circuit Breakers Fail
Even the best breakers degrade over time due to:
- Mechanical fatigue from repeated tripping/resetting
- Electrical surges caused by lightning or faulty equipment
- Corrosion due to moisture inside the panel
- Improper installation or loose wiring
- Manufacturing defects in older panels
Symptoms of a Faulty Circuit Breaker
- The breaker won’t stay in the “ON” position
- You notice scorch marks or a burnt smell
- There's buzzing, crackling, or hissing coming from the panel
- The breaker feels hot to the touch
- A particular circuit loses power intermittently
What You’ll Need
Basic Tools:
- Flathead and Phillips screwdrivers
- Multimeter or voltage tester
- Flashlight or headlamp
- Needle-nose pliers
- Wire stripper (in case the wire needs reworking)
Safety Gear:
- Insulated gloves
- Safety glasses or a face shield
- Rubber-soled boots
- Arc-rated shirt (for added protection in older panels)
Materials:
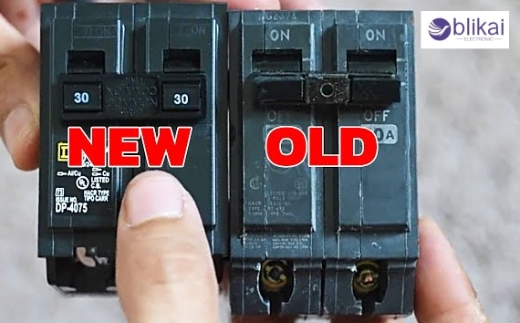
- Replacement breaker (same brand, type, and amp rating)
- Panel directory map or notebook
- Electrical tape or labeling stickers
Pro Tip: Snap a photo of the existing breaker configuration before removing anything.
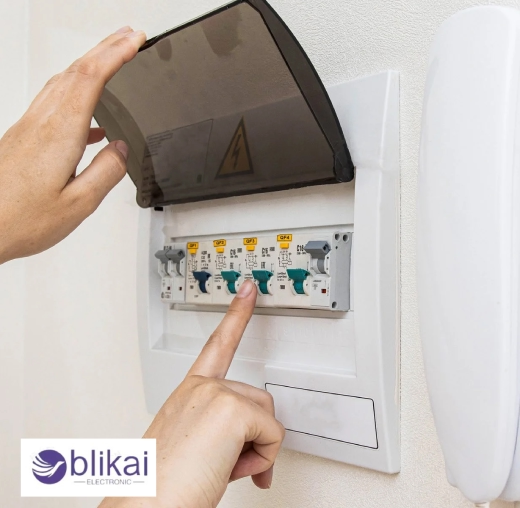
Electrical Safety 101: What to Know Before You Begin
Understanding Your Electrical Panel
The panel (or “load center”) houses all the circuit breakers and distributes power from the utility line. It includes:
- Main breaker – shuts off all power downstream
- Bus bars – metal rails that carry power to each breaker
- Neutral and ground bars – return path for current and safety
Know the Danger Zones
Even with the main breaker off, the incoming service lines remain energized. Never touch the wires connected to the main lugs unless you are a qualified electrician.
Step-by-Step: How to Replace a Circuit Breaker
Step 1: Diagnose the Problem
Check the affected circuit with a voltage tester or plug-in appliance.
Confirm that a tripped GFCI outlet or blown fuse in the device doesn’t cause the issue.
Inspect the suspect breaker for physical damage or irregular behavior.
Step 2: Shut Down Power Safely
Turn off all individual circuit breakers one by one.
Finally, shut off the main breaker.
Confirm total power loss using a multimeter on several outlets and the panel itself.
Step 3: Remove the Panel Cover
Use the correct screwdriver to loosen the screws on the outer panel.
Remove the cover carefully—don’t let it fall.
Be cautious around exposed conductors.
Step 4: Verify the Panel Is De-energized
Test for voltage on the bus bars and terminals using a multimeter.
No reading? You’re good to proceed.
Step 5: Disconnect the Load Wire
Determine the circuit wire that is connecting to the failed breaker.
Loose the terminal using a screwdriver.
Gently tug the wires out so that you do not accidentally damage the insulation.
Step 6: Remove the Breaker
Pull at the breaker and tilt it outward so that it lifts up and away from the bus bar.
You need to do a bit of wiggling, but not much force should be needed.
If it isn’t moving, make sure there are no wires in its path.
Step 7: Inspect the Slot and Bus Bar
Use a flashlight to check for scorch marks or carbon deposits.
Clean the area with a dry cloth or contact cleaner (if rated for electrical use).
Don’t proceed if the metal appears damaged or pitted—call an electrician.
Step 8: Insert the New Breaker
Align the new breaker so the terminal faces outward.
Push the rear connector into the bus bar until it clicks into place.
Ensure it is fully seated and level with adjacent breakers.
Step 9: Reconnect the Load Wire
Strip 1/2 inch of insulation if necessary.
Insert the wire into the terminal and tighten securely.
Do not overtighten to avoid damaging the screw or wire.
Step 10: Close Up the Panel
Carefully replace the panel cover and screws.
Make sure all breakers are in the OFF position before restoring power.
Step 11: Restore Power and Test
Turn the main breaker ON first.
Then switch the new breaker ON.
Test the circuit with a lamp, power tool, or outlet tester.
After-Replacement Checklist
- The circuit functions correctly
- No hot spots on the breaker after 15–30 minutes
- No unusual sounds from the panel
- The breaker stays in the ON position
Troubleshooting: What If It Still Trips?
- Check connected appliances – Unplug everything and test the circuit with nothing plugged in.
- Inspect for wire damage – Look for nicks or shorts in the cable
- Use a multimeter – Test resistance between hot and neutral/ground
- Replace with a GFCI/AFCI if updated code requires it
If the problem persists after replacing the breaker, the issue may be:
- A short circuit in the wall wiring
- A failed outlet or switch
- Overloaded circuit (too many high-power devices)
When to Call a Licensed Electrician
- You’re not comfortable working on the panel
- The panel is outdated (Zinsco, Federal Pacific, etc.)
- You need to upgrade the amperage or add new circuits
- There’s evidence of burned wiring or melted insulation
- Breakers trip even with no load
Conclusion
Replacing a circuit breaker by yourself helps to care for your home and ensures you are safer with electricity. If done properly, it helps improve your home’s electrical system and save it from yearly replacements.
Always remember: Safety first. When in doubt, contact a certified electrician.
FAQs
Can I use any brand of breaker in my panel?
No. Breakers must match the brand and type listed by the panel manufacturer (e.g., Square D, Siemens, GE). Mismatched breakers can cause overheating or poor contact.
Is replacing a circuit breaker dangerous?
It can be done without proper safety precautions. Always shut off the main breaker and verify voltage before touching anything.
Can I upgrade a 15A breaker to 20A?
Only if the wire gauge supports it (12 AWG or thicker), otherwise, it’s a fire hazard. Never upgrade breaker size without verifying wire specs.
How much does it cost to replace a breaker?
DIY cost is $10–30 for a breaker. Hiring an electrician may cost $100–250, depending on location and complexity.


